
SILENT HILL: Townfall Strange Postcard Locations (All 15)
Find all 15 Strange Postcards by chapter, track missing cards, print the checklist and back up your progress. Includes access steps and carryover rules.
How the postcard collection works
15 Strange Postcards are scattered across Parts 1-6. Each is a physical pickup collected while playing as Simon — walk up and interact. Progress carries between playthroughs, so none are permanently missable if you miss one on a first run. Collecting all 15 unlocks the “Blur Your Eyes” trophy/achievement. They hint toward the Sci-fi ending but are not required to trigger it.
Find a missing postcard
Start with your current area: Shorefront South: #1–4 · The Wynds / Shorefront North: #5–6 · Altered Medical Center: #7–9 · Clara Woods: #10–14 · CEG HQ (Different): #15.
The numbers below follow this guide’s route order. Match the location and chapter, rather than assuming the number identifies a picture in your inventory. For in-game location images, use the linked illustrated source guide.
Open a numbered item below to share its exact location. Use Part and Show remaining only to narrow the list. Print this view prints the visible items with your ticks; Export progress downloads a backup you can import on another device. Import merges ticks without clearing existing ones. These are manual website notes, separate from your game save.
1 · 2 · 3 · 4 · 5 · 6 · 7 · 8 · 9 · 10 · 11 · 12 · 13 · 14 · 15
Strange postcards · 15 items
Clear the ticks in this list? Other lists and Parts outside this view are kept.
Locations are available below. Enable JavaScript to use the manual progress tracker.
Export backs up all postcard ticks, including hidden items. Import adds ticks without clearing yours or enabling browser storage.
- Link to postcard 1
- Link to postcard 2
- Link to postcard 3
- Link to postcard 4
- Link to postcard 5
- Link to postcard 6
- Link to postcard 7
- Link to postcard 8
- Link to postcard 9
- Link to postcard 10
- Link to postcard 11
- Link to postcard 12
- Link to postcard 13
- Link to postcard 14
- Link to postcard 15
No items match this view.
Manual notes only. This does not read a game save, sync with Steam or PlayStation, or verify a trophy. Saving is optional and stays in this browser.
Postcard locations by part
Landmark 14 in item 4 refers to the numbered map used by the location reference, not to postcard 14 or an address. Use its illustrated location if you cannot identify that apartment; the room and pickup checks below narrow it down. Part 5 has no postcards in this source list; the final card is in Part 6.
Part 1 — Arrival
| # | Chapter | Area | Where |
|---|---|---|---|
| 1 | Ch. 3: A Connection | Shorefront District South | VIDEO STAR store west of Town Square, on the counter |
| 2 | Ch. 4: Searching for Zoe | Shorefront District South | Enter St. Amelia Park from the south, turn left into the rear alley; check the ground by the dumpster |
| 3 | Ch. 4: Searching for Zoe | Farrow Street | North of the park, follow Farrow Street west; check the wall at the end |
| 4 | Ch. 4: Searching for Zoe | Shorefront District South | Apartment south of map landmark 14: upstairs to apartment 1/2, southeast bedroom, floor at the foot of the bed |
Part 2 — Zoe
| # | Chapter | Area | Where |
|---|---|---|---|
| 5 | Ch. 6: Journey to Medical | The Wynds | Alley west of The Wynds phone booth; descend the stairs and check beside the boots |
| 6 | Ch. 6: Journey to Medical | Shorefront District North | Apartment south of Medical: ground-floor rear exit, then the last shed on the left |
Part 3 — The Patient
| # | Chapter | Area | Where |
|---|---|---|---|
| 7 | Ch. 8: Many Into One | St. Amelia Medical Center | Altered Medical at chapter start: X-Ray door 7103, rear counter |
| 8 | Ch. 8: Many Into One | St. Amelia Medical Center | Ward W, room 06, on table |
| 9 | Ch. 8: Many Into One | St. Amelia Medical Center | Ward P, room 08, inside wall medical cabinet |
Part 4 — Clara Woods
| # | Chapter | Area | Where |
|---|---|---|---|
| 10 | Ch. 9: Begin Again | Clara Woods | Take the right road fork; past the hanging body, use the alley and two gates, then inspect the shed shelf |
| 11 | Ch. 10: Missing Parts | Clara Woods Estate | Upper-floor apartment: back-left bedroom from the entrance, dresser drawer |
| 12 | Ch. 10: Missing Parts | Atlas Computers area | Break the shop window opposite Atlas Computers; check the table inside |
| 13 | Ch. 10: Missing Parts | Overpass SE corner dead end | Beside a metal cart |
| 14 | Ch. 10: Missing Parts | Upper Brae house | Switch to “Tape: Tomorrow”, exit back door, crouch into shed — requires Back Door Key |
Part 6 — Simon
| # | Chapter | Area | Where |
|---|---|---|---|
| 15 | Ch. 14: Fix This | CEG HQ (Different) | After the short ladder and vent door: right in the pipes, left at the four-way junction, ground at the dead end |
Landmarks for postcards 4, 14 and 15
Postcard #4 is not map marker 4. The location guide identifies its building relative to map landmark 14; that number does not mean postcard #14. Go upstairs to apartment 1/2 and look at the foot of the bed in the southeast room.
For #14, the world state and Back Door Key are prerequisites: choose Tape: Tomorrow, then take the back exit toward the shed. For #15, start counting turns only after the short ladder and vent door. The first right and the left at the four-way junction are different decisions.
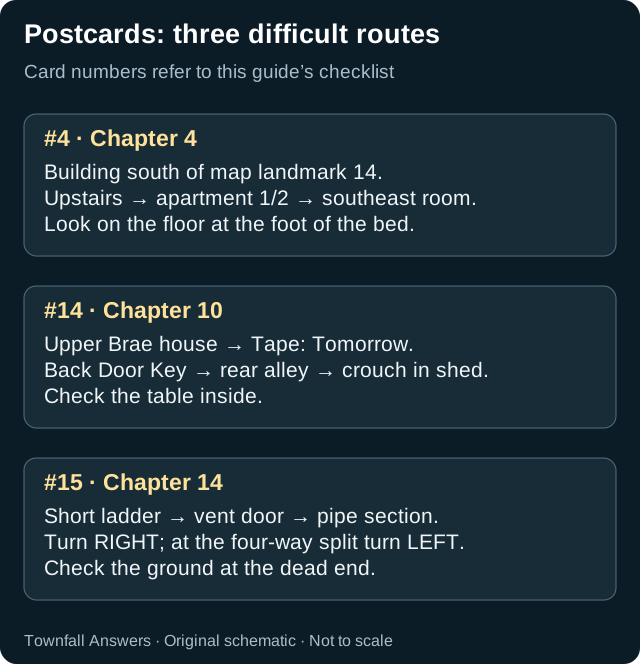
Postcards 4, 14 and 15 — original route schematic, not to scale.
Original guide diagram — not an in-game screenshot. Evidence and detailed steps are listed in this guide.
Open full-size diagramThese are the published location guide’s landmarks, rechecked on 28 September. The schematic adds no measured distances or map coordinates. Keep the existing item numbers when recording your progress.
Missable windows
An area’s access window and your collected record are separate. If you leave an area before picking up a card, returning during that run may require an earlier save. You can also collect missing cards on a later playthrough. Cards already collected remain in the game’s Documents inventory across playthroughs, according to both linked location guides.
If a card appears absent, check Documents first and confirm the chapter and world state. In particular, #7 is in the altered Medical Center, not the earlier visit. The website tracker does not read your Documents inventory; mark it manually. See how to save for ordinary runs and the separate no-manual-save challenge.
Related pages
- Arrival walkthrough — Part 1 postcards #1-4
- Clara Woods walkthrough — Part 4 postcards #10-14
- CRTV guide — the device used to find some signals
Related Articles
walkthrough Verified
SILENT HILL: Townfall Arrival Walkthrough — Part 1
Shorefront District and St. Amelia
walkthrough Source-reviewed
SILENT HILL: Townfall Part 4: Clara Woods Walkthrough
Clara Woods, Upper Brae, Atlas Computers, CEG HQ
guide Verified
How to Save in SILENT HILL: Townfall — Dial 100 & Autosaves
Did this guide help you?
JavaScript is needed for these buttons. You can still send a correction using the link below.
Send a correction or missing detail